Showing posts with label cross-stitch. Show all posts

Tuesday, February 8, 2011

Stitching Pixels: How It's Done pt. 2

Making the Pattern


Making a cross-stitch pattern out of your image is probably the most tedious, time consuming part of the process (other than the actual stitching, of course).  I've been using Adobe Illustrator to make my patterns, and that's what I'll be using in this how-to.  I realize not everyone has access to AI, so I won't go too far into program specific detail.  There are plenty of other (sometimes free) programs that will do basically the same things I'm doing here.


STEP ONE - Find the Borders


The first thing I do after opening the image is find the borders of the image itself (when opening the image, you might want to enlarge it so the lines you make later don't run together and make the pattern unreadable).  I use the line drawing tool to draw horizontal lines at the edges of the top and bottom-most pixels and vertical lines at the left and right-most pixels.  This will help find the exact center of the image itself without having to worry about whether or not you added an equal amount of space around the edges.  Adding a margin can be done much later in the sewing process.


When drawing my border lines, I like to make them a little thicker than I plan to make the actual grid and of a brighter, more visible color.  When this step is done, it'll look a little something like this:


STEP TWO - Find the Center


This step will probably vary depending on what image editing software you use.  In AI, it's pretty easy.  At worst, you'll just have to do some counting and simple math.


I start off by using the pencil tool to draw little carrot shapes ( > ) with the point on the top and bottom lines along the side of the image.  Then I draw one kind of floating in the middle between those two.  In AI, I can select all three carrots and use the align tool to distribute them evenly by the center of the shapes.  This will move the middle floating carrot to the exact center of the ones on the top and bottom, giving you the place to put your center line!  Repeat the same steps for the top, and you'll be ready to draw your center lines:
(click on the image for a better view)

If you don't have the ability to align your little arrows like I did in the program you're using, you might actually have to count the pixels from top to bottom/side to side and divide them by two the old fashioned way.  If you come up with an odd number and it doesn't divide evenly (or if your little carrot aligns itself in the center of a pixel instead of in between rows), just shift over or up to the nearest space.  In  big pattern like this one, half a pixel isn't that big of a deal, but in really small patterns you might keep it in mind.  But like I said, it's not that big a deal.


STEP THREE - Drawing More Lines

This is where the process can get a little tedious.  Using the line tool again, start making lines in one direction using the pixels themselves as a guide to start making the grid.  Make sure your lines are thin enough to not obscure the pixels too much, and use a color that contrasts with both the image and your center lines.  Once you get a few drawn, you can use the align tool to space them out evenly (if you're using Illustrator) and then copy and paste the group so you don't have to draw every single line.  If you're not using Illustrator but another program that uses layers, make the lines on a separate layer from the image (to avoid certain disaster) and do the copy/paste thing.


To make the sewing easier, I like to break up my grid into half-inch "blocks".  In this case, I'm cross-stitching on 14-count fabric, meaning that there are going to be 14 stitches per inch.  In my pattern, then, I make ever 7th line a little thicker.  When the grid is done, you'll have little squares to use as reference points!

Now, once you have all of the lines drawn in one direction, you can do one of two things.  You can either repeat the same process of line drawing.  Or you can copy the lines you already drew, rotate them 90 degrees and align/resize them to fit your image to complete the grid.  I suppose it depends on what program you're using.  If you are in fact using Illustrator, the second of the two choices is definitely the way to go.  

This is just one quadrant of the whole image, but when it's done, it should look something like this:


And there you have your completed cross-stitch pattern!  In Part 3, I'll go over the thread color picking process.  It's more exciting than it sounds, I promise!  

Friday, January 28, 2011

Stitching Pixels: How It's Done pt. 1

Choosing the Image


Stitching video game sprites is one of my favorite craft projects, so I thought I would share the process.  It's time-consuming, but what craft project worth doing isn't?  I find the more time I put into something like this, the more rewarding (and awesome!) the end result.


The first step is deciding what sort of thing you want to do and how difficult you want the project to be.  For instance, old 8-bit games used fewer colors and had fewer shades on screen at once than 16-bit games, so they're generally much easier.  Size is another consideration.  Do you want to go all out and stitch an entire screen or just one or two sprites?  And, probably the most important consideration ... what game should your pattern come from?


Once all of this is considered, it's time to hit the web for pictures!  I find I have the best luck doing a Google image search for "(insert game title/character name) screenshot/sprite".  Always make sure to view the image at full size to make sure it's nice and crisp.  Images where the pixels look blurred or fuzzy are just going to cause major headaches for the rest of the project.


Another thing that makes life easier is keeping your images organized.  I have a special folder where I keep all of my source images and a folder within that one where I keep my completed patterns.  Once you find the image (or images) you want to use as a pattern, save it in that folder for later.  For this example project, I'll be using this image:


And that's it for step one!  Next time, we'll get into using this image to create a pattern to cross-stitch from.  Until then, be creative and happy hunting!

Saturday, August 7, 2010

Stitching Pixels: Phantasy Star Update!

In a previous post, I mentioned that I was undertaking a fairly large cross stitching project: the entire title screen of the first Phantasy Star game for the Sega Master System!  I've been working on it off an on for quite a while now, and I finally feel like I've made enough progress to post an update...


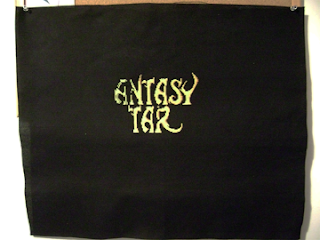
This is a zoomed out picture of the whole canvas so far (my digital camera is terrible, by the way).  I started at the center and have been working my way to the left with the lettering.  The area I have stitched so far is about 7 inches wide by 5 inches tall.


This is a much closer (and much better) picture of the stitches themselves.  I've decided to save the white for last so it doesn't get too dirty while I continue to work on it.  I'd hate to think of what could happen to it if I did have to wash it after spending that much time working on it.  Oh no, I don't want to think about that at all...

So there's the update!  Slowly but surely, I'm making some progress.  Hopefully when it's all done, it'll look a little something like this:


Until next time, happy gaming and even happier crafting!


Thursday, July 1, 2010

Stitching Pixels: Sew Old School


Cross stitching is something I used to do a lot when I was younger (I guess it should come as no surprise that I spent a lot of time with Grandma as a kid).  It's a fairly relaxing and stress-free activity.  It's easy.  And most of all ... it's fun!

Or at least I think so.

Did I mention stress-free?  That's also kind of important....

In any case, not only do I occupy my time with a lot of old lady crafts, I play a LOT of video games.  Old, new, something that came out last year, yesterday, or twenty years ago ... I love 'em!  It seems only natural that, by some chance, these two hobbies would cross paths somewhere in the twisted wires of my overactive brain...

Thus the birth of my concept, Sew Old School.  I started browsing The Tubes (also known as The Internet) for screen shots and sprites from some of my favorite 8 and 16-bit games and, with some mad Adobe Illustrator skills, turning them into cross stitch patterns.  It was a bit tedious at first, but, on the list of weird things I find solace in, tedium is pretty close to the top.  Hey, I did say "weird," didn't I?

My first project idea came from one of the pioneers of my favorite genre of gaming: the RPG classic, Final Fantasy.  I used the sprites for the team I chose to play the game with (from top to bottom: Fighter, Thief, White Mage, and Black Mage) and the "title" of my new project.

From there, I moved on to a character any fan of the Final Fantasy series knows and either loves or hates: Kefka, the mad villain of Final Fantasy VI.  His laugh is an iconic part of his character, so it was obvious that I should choose his sprite's laughing animation for this one.

Although I didn't play it until much later in my "gaming career" than most people (what can I say, I was a Sega kid), Final Fantasy VI quickly became one of my favorite games of all time.  Not only is it one of my favorite games, but it's one of my boyfriend's as well.  So, at his request, I chose another FFVI sprite for my third cross stitch, the diabolical reoccurring octopus monster...

ULTROS!  Isn't he just cuuuute?!  Erm, yeah...

He came out a little lighter than the actual sprite, I think.  At this point in time, I was having a harder time matching thread color to actual pixel color, but I have a much better grasp on it now.  I've discovered that building a "color sheet" out of the individual pixel colors and then transferring that as a photo to my iPhone is really useful, especially with the 16-bit sprites.  Eventually, this piece will be accompanied by another, namely the team battling this fiend (Edgar, Shadow, Locke, and Celes, for those of you who are curious).  I don't know if I'm quite ready to handle that many colors in such a small space at once just yet...

In the mean time, I've decided to work on a simpler pattern or two, build up my thread reserves, and work on something both a little grander and simpler at the same time.  You see, I've recently taken a trip back to the 8-bit age of gaming and finished a game I can remember watching my uncle play when I was but a wee kindergärtner... 

...the original Phantasy Star!  It was released on the Sega Master System at about the same time as Final Fantasy and is somewhat overlooked as far as genre-defining RPGs go in my opinion.  So, paying homage to this great game from ages past (and killing some time before I fire up Phantasy Star II), I've decided to stitch the title screen in all of it's 187 x 245 pixel glory!  At 14 stitches per inch, it's a good thing I have a nice big, open space on my wall just waiting for the framed up version to be done.

Also on deck, I have a few more classic patterns all gridded-up and ready to go, namely Sonic the Hedgehog, Donkey Kong, and Astro Warrior.  Until then, I'll be busy sewing, painting, collaging, and who knows what else...

If you have any requests, please feel free to let me know.  I like to think I'm pretty good about checking/responding to e-mails, so shoot one my way!  Who knows, I might even end up working out some sort of exchange with you...